Identifying Air Conditioner Issues and How an HVAC Contractor Woodbridge VA Can Help

Woman turning on air conditioner with remote Woman turning on air conditioner with remote Aircon stock pictures, royalty-free photos & images

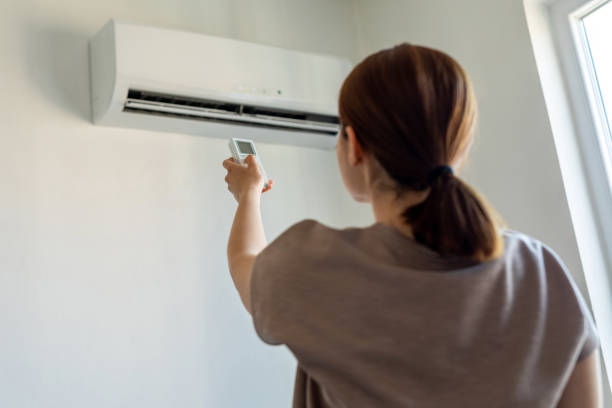
Your air conditioner is an essential part of maintaining comfort in your home, especially during warmer months. However, like any other appliance, it can encounter problems over time. Understanding some of the most common issues that arise and how to address them can save you significant time and money while ensuring your system works efficiently.

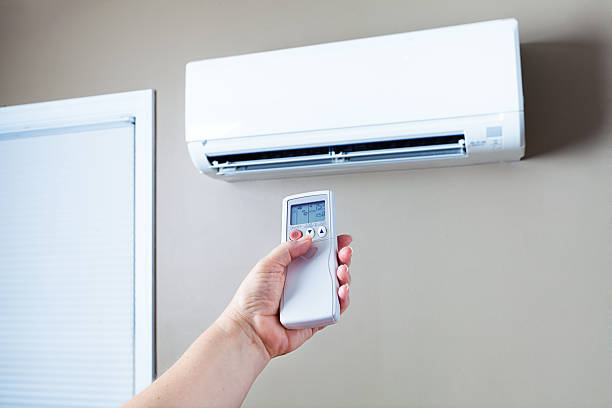
Common Air Conditioner Problems

  1. Possible Causes:
    • Tripped circuit breaker.
    • Faulty thermostat settings.
    • Loose or damaged wiring.
    • Check and reset the circuit breaker.
    • Inspect thermostat settings; ensure it’s set to “cool” mode and reduce the temperature a few degrees below room temperature.
    • Call a professional to inspect for electrical issues if needed.
  2. Possible Causes:
    • Dirty air filters restricting airflow.
    • Low refrigerant levels due to leaks.
    • Compressor failure.
    • Replace or clean air filters regularly (every 1-3 months).
    • Have refrigerant levels checked by a licensed technician.
    • Schedule a compressor inspection for possible replacement or repair.
  3. Possible Causes:
    • Blocked vents or ducts restricting airflow.
    • Undersized AC unit for your space.
    • Ensure vents are open and unobstructed by furniture or debris.
    • Consult with an HVAC professional about upgrading to a properly sized system if undersized.
  4. Unusual Noises During Operation
    Noises such as grinding, banging, or squealing often indicate mechanical issues like:
  5. Worn-out belts.
  6. Loose components within the motor.
  7. Debris caught in fan blades.

Solutions:
* Turn off the system immediately if noises occur to prevent further damage.
* Schedule maintenance for part replacement or cleaning.

  1. Water Leaks Around the Unit
    Water pooling around your unit is typically related to condensation problems caused by:

    • A clogged condensate drain line.
    • A broken condensate pump (if installed).
  2. Solutions:
    Clear blockages from drain lines using a wet/dry vacuum or pipe cleaner.
    Replace faulty condensate pumps with assistance from a professional.

Preventative Maintenance Tips

  • Regular Filter Replacement:Dirty filters strain your system, reducing efficiency and causing unnecessary wear on components.
  • Seasonal Checkups:Schedule inspections twice yearly — before summer and winter — to identify potential issues early on.
  • Keep Outdoor Units Clean:Ensure no debris, such as leaves or dirt, accumulates around outdoor condenser units that could hinder proper airflow.

When Professional Help Is Needed

Problem Professional Solution Reason
Refrigerant Leaks Leak detection & refilling Requires licensed EPA-certified technician
Electrical Issues Wiring inspection & repair Safety hazard without proper training
Compressor Failure Compressor replacement Involves working with high-pressure systems

Common Causes of Water Leaks and Effective Solutions for AC Repair Woodbridge VA

Ignoring these problems can lead to further damage, reduced efficiency, and costly repairs. Below, we’ll explore the common causes of water leaks around your AC system and how to resolve them effectively.

Common Causes of Water Leaks

  1. A clogged air filter restricts airflow over the evaporator coil, leading to freezing of the coil. When the ice melts, excess water may overflow from the drip pan.
  2. The drain pan collects condensation from the AC system and directs it toward the drain line. Cracks in the pan or an overflowing condition due to excessive moisture can result in visible leaks.
  3. Insufficient refrigerant can cause pressure drops within the system, leading to freezing of the evaporator coil. When thawed, this frozen buildup may create excessive water that leaks out.
  4. Incorrectly installed units or neglected maintenance may cause misaligned drainage systems or unsealed components that allow water to escape.

Steps to Resolve Water Leaks

  1. Use a wet/dry vacuum or a plumber’s snake to remove blockages in your drain line effectively.
  2. Periodically flush it with a mixture of water and vinegar (1:1 ratio) to prevent future clogs.
  3. Check your air filter monthly and replace it every 1-3 months as needed.
  4. A clean filter not only prevents leaks but also improves overall system performance.
  5. Carefully inspect for cracks or rust in your drain pan.
  6. Replace damaged pans with compatible parts available at most HVAC supply stores.
  7. Hire an HVAC professional to inspect refrigerant levels and repair any leaks in the coils if necessary.
  8. Low refrigerant should always be handled by certified technicians for safety reasons.
  9. Make sure your unit is correctly leveled during installation so that condensation flows toward the drain naturally.
  10. Schedule annual professional maintenance checks for thorough cleaning of coils and inspection of all components.

Preventive Tips

  • Regularly check for visible signs of water near your AC unit.
  • Conduct routine inspections to ensure there are no clogs or damages within your drainage system.
  • Schedule seasonal maintenance with certified HVAC professionals before peak cooling seasons begin.
Issue Cause Solution
Clogged Drain Line Dirt/Mold Blockage Clean/Flush Regularly
Dirty Air Filter Dust Accumulation Replace Filter Monthly
Damaged Drain Pan Cracks/Rust Inspect & Replace if Necessary
Low Refrigerant Leak in Coils Professional Repair Needed

Addressing these issues promptly will help ensure optimal performance of your HVAC system while preventing unnecessary damage caused by water leakage.

Furnace Repair Woodbridge VA: Addressing Water Leaks Around Your Air Conditioner

Left unresolved, these leaks can lead to water damage, mold growth, and reduced efficiency of your HVAC system. Below, we’ll explore the most common causes of water leaks in air conditioning systems and provide practical solutions to address them.

Common Causes of Water Leaks in Air Conditioners

  1. The condensate drain line is responsible for carrying away moisture collected from the cooling process. Over time, dirt, debris, or algae can build up inside the drain line, causing a blockage that results in water backing up and leaking out around the unit.
  2. Solution: Use a wet/dry vacuum or a plumber’s snake to clear clogs from the drain line. Regularly flushing it with distilled vinegar can prevent future buildup.
  3. When air filters are clogged with dust and debris, airflow is restricted. This restriction may cause the evaporator coil to freeze due to insufficient warm air circulating over it. As the coil thaws, excess water may overwhelm the drainage system and leak onto surrounding areas.
  4. Solution: Replace or clean air filters every 1-3 months depending on usage and manufacturer recommendations.
  5. Older units may have corroded or damaged drain pans that fail to collect condensation effectively. Cracks in the pan allow water to drip outside of its intended path.
  6. Solution: Inspect the drain pan for visible damage and replace it if necessary.
  7. Insufficient refrigerant causes pressure within the system to drop, which can lead to freezing of the evaporator coil. Similar to dirty filters, when this frozen coil melts, it produces excessive condensation that might result in leaks.
  8. Solution: Contact a licensed HVAC technician to inspect refrigerant levels and recharge your system if needed.
  9. If an air conditioner was not installed correctly—such as being unevenly positioned—water may not flow properly through the drainage system.
  10. Solution: Ensure your unit is level by adjusting its placement or contacting a professional installer for correction.

Proactive Measures to Prevent Water Leaks

  • Schedule Regular Maintenance:Routine HVAC maintenance helps identify potential issues before they grow into major problems.
  • Inspect Drain Lines Periodically:Look for signs of buildup or blockages in condensate lines.
  • Keep Surroundings Clean:Ensure no debris near your unit obstructs airflow or interferes with proper drainage.
  • Monitor System Performance:Unusual noises or inconsistent cooling might indicate hidden problems impacting moisture control.
Common Problem Likely Cause Recommended Action
Puddle near indoor unit Clogged condensate line Clear blockage using vacuum
Frequent water pooling Dirty air filter Replace filter regularly
Persistent leaking Damaged drain pan Replace pan
Frozen evaporator coils Low refrigerant Call an HVAC technician

Always consult a professional when repairs are beyond basic DIY troubleshooting efforts for safety and efficiency reasons.

Lowering and Turning Off Air Conditioning to Conserve Eletricity Energy Subject: Lowering the temperature in air conditioning unit for greener energy power consumption. Aircon stock pictures, royalty-free photos & images

Troubleshooting Tips for HVAC Installation Woodbridge VA to Solve Low or No Cooling Issues

If your HVAC system is struggling to cool your home or is not providing any cooling at all, it can lead to discomfort and rising energy costs. Understanding the potential causes of low or no cooling and troubleshooting them effectively can save you time and money. Below are some common reasons your HVAC system may not be functioning optimally, along with tips for resolving them.

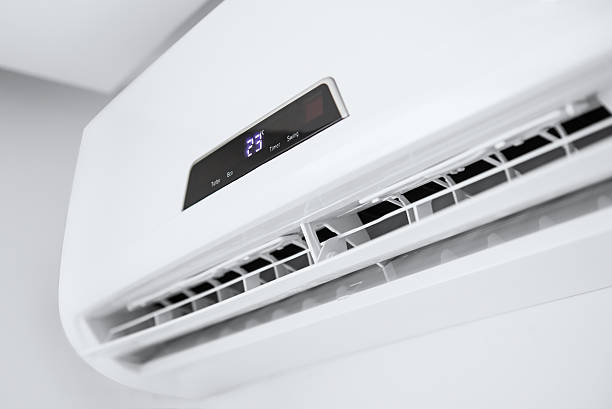
A simple but often overlooked issue lies in the thermostat settings. Ensure that: – The thermostat is set to “cool” mode. – The temperature setting is lower than the current room temperature. – The thermostat has functioning batteries, if applicable.

If these steps don’t work, consider resetting the thermostat to its factory settings as a diagnostic measure.

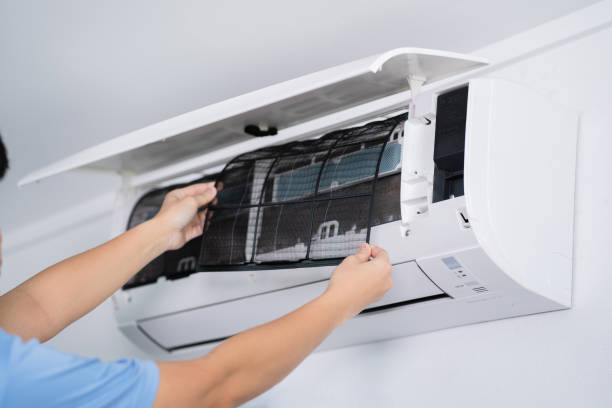
Dirty or clogged air filters can severely restrict airflow, leading to reduced cooling performance. To address this: – Check your filter for dirt or debris build-up. – Replace disposable filters every 1–3 months, depending on usage and manufacturer recommendations. – For reusable filters, clean them regularly with water and allow them to dry completely before reinstalling.

Pro Tip:Set a reminder for filter maintenance to prevent future blockages.

Low refrigerant levels are a common cause of insufficient cooling.

If you suspect refrigerant issues, contact an HVAC professional since handling refrigerants requires EPA certification.

Outdoor condenser coils can become dirty over time due to exposure to dust, leaves, and other debris. This reduces their efficiency in transferring heat outside your home.

Steps for cleaning condenser coils: 1. Turn off power to the HVAC unit at the circuit breaker. 2. Remove debris around the outdoor unit using a soft brush or vacuum cleaner. 3. Rinse the coils gently with a garden hose (avoid high pressure). 4. Allow them to dry before turning the power back on.

Leaky ductwork allows conditioned air to escape before reaching your living spaces, reducing overall system efficiency and cooling performance.

Signs of duct leaks include: – Uneven temperatures across rooms. – Higher-than-normal energy bills.

To address this: – Inspect ducts for visible gaps or holes. – Apply aluminum tape or mastic sealant as a temporary fix until professional repairs are made.

Failing capacitors, relays, or wiring issues could prevent your HVAC system from starting properly or delivering adequate cooling power.

Common indicators of electrical problems include: – A clicking sound when turning on the unit but no operation. – Intermittent system shutdowns.

For safety reasons, leave electrical repairs to certified technicians as improper handling may result in injury or further damage.

Summary Table for Emergency HVAC Service Woodbridge VA

Problem Possible Cause Recommended Action
Thermostat not working Incorrect settings/battery issues Adjust settings; replace batteries
Weak airflow Clogged air filter Replace/clean air filter
Warm air blowing from vents Low refrigerant levels Contact an HVAC professional
Inconsistent temperatures Leaky ducts Seal duct leaks temporarily; call a pro
System won’t start Electrical malfunction Consult an experienced technician

By systematically addressing these potential issues, you can restore cooling efficiency and prolong your HVAC system’s lifespan while minimizing repair costs long term. Options such as regular maintenance checks by professionals help catch small problems before they escalate into significant failures—ensuring consistent comfort in every season.

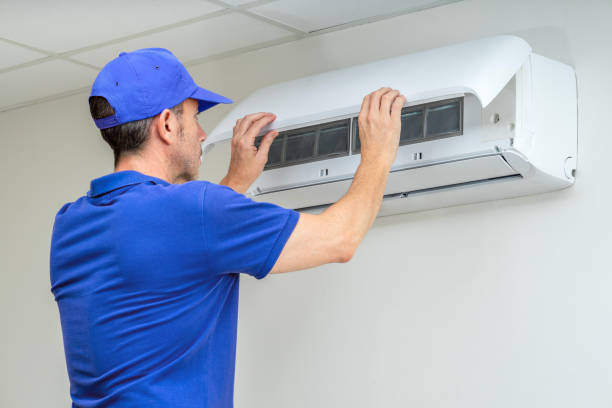
The Benefits of Trusting Professionals for Your HVAC Repair Needs

When it comes to HVAC repair, many homeowners might consider taking a DIY approach. While some minor maintenance tasks can be managed without professional assistance, complex repairs require the expertise of trained technicians. Trusting professionals for your HVAC repair needs offers a variety of benefits that ensure efficiency, safety, and long-term performance.

Expertise and Knowledge

Certified HVAC professionals undergo specialized training and have in-depth knowledge about various systems. This expertise allows them to quickly diagnose problems and provide effective solutions.

  • Faulty wiring or electrical problems
  • Refrigerant leaks or imbalances
  • Malfunctioning thermostats
  • Compressor failures

Professionals also stay up-to-date with industry advancements, helping you benefit from the latest repair techniques or energy-efficient solutions.

Safety Considerations

Repairing an HVAC system involves handling potentially hazardous components like high-voltage electrical parts, refrigerants, and heavy mechanical equipment. Without proper training, these tasks can pose serious risks to health and safety. Professionals are equipped with the right tools and safety gear to perform repairs securely.

Additionally, improper repairs can cause further damage to your system or even create fire hazards. Hiring licensed technicians ensures compliance with safety standards and reduces the risk of accidents.

Cost Efficiency

While hiring a professional may seem more expensive upfront compared to DIY attempts, it often proves cost-effective in the long run.

  • Diagnose issues accurately without unnecessary trial-and-error methods
  • Prevent minor problems from escalating into costly repairs
  • Use high-quality replacement parts that enhance system longevity

Moreover, many HVAC companies offer warranties on their work, giving you peace of mind if issues recur within a specified period.

Improved System Performance

Properly repaired systems operate more efficiently, reducing energy consumption and lowering utility bills over time. Professional technicians optimize performance by addressing underlying issues that might otherwise go unnoticed during DIY fixes.

Issue Professional Solution Result
Dirty condenser coils Thorough cleaning using specialized tools Improved cooling efficiency
Refrigerant imbalance Accurate recharging or leak sealing Consistent temperature control
Blocked air filters Replacement with appropriate filter types Better airflow and indoor air quality

Extended Equipment Lifespan

Regular maintenance and expert repairs extend the lifespan of your HVAC unit by preventing unnecessary wear and tear. A well-maintained system can last several years longer than one subjected to improper handling or neglect.

Warranty Protection Compliance

Many manufacturers require proof of professional maintenance for warranties to remain valid. Opting for professional repairs ensures that your system complies with warranty requirements should you need future replacements covered under warranty terms.

When Should You Contact a Professional?

  1. Your AC blows warm air despite thermostat adjustments.
  2. Unusual noises (e. g. , grinding or hissing) are coming from the unit.
  3. You notice frequent cycling on/off patterns.
  4. Your energy bills suddenly spike without increased usage.
  5. Persistent water leaks appear around your unit.

Trusting professionals not only minimizes stress but also guarantees efficient solutions tailored specifically to your HVAC needs—a worthwhile investment for both comfort and safety in your home year-round.

How to Identify When It’s Time for an HVAC Replacement Instead of Repair

Deciding whether to repair or replace your HVAC system can be a challenging task. While repairs may seem like the more cost-effective option in the short term, there are specific situations where replacement is the smarter and more economical decision in the long run. Here’s how to evaluate when it’s time to replace your HVAC system instead of opting for another round of repairs.

Factors That Indicate Replacement Is Necessary

  1. Most HVAC systems, including air conditioners and furnaces, have a lifespan of 10-15 years. If your system is nearing or exceeding this age range, it may no longer operate efficiently, even with frequent repairs.
  2. Older systems often lack the energy efficiency of modern units, which can lead to increased utility bills.
  3. If you find yourself calling a technician multiple times a year or spending significant amounts on repeated fixes, replacing the unit might be more cost-effective.
  4. Use this rule of thumb: if repair costs exceed 50% of the cost of a new system, it’s time to consider replacement.
  5. Older units tend to struggle with energy efficiency compared to newer models that meet modern standards such as ENERGY STAR certifications.
  6. Look for rising utility bills despite no changes in usage. This could indicate your unit is working harder than necessary due to wear and tear or outdated technology.
  7. An inability to maintain consistent temperatures throughout your home could signal that your unit isn’t operating at its full capacity.
  8. Uneven heating or cooling is often caused by aging components that cannot be repaired effectively.
  9. Systems using phased-out refrigerants like R-22 (Freon) can be costly to service due to limited availability.
  10. Modern systems use environmentally friendly refrigerants that are less expensive and easier for technicians to work with.

Benefits of Replacing Your HVAC System

Benefit Details
Increased Energy Efficiency Newer systems consume less energy and help lower monthly utility bills.
Better Indoor Air Quality Modern units include advanced filtration systems for improved air purity.
Enhanced Comfort A new system ensures consistent heating and cooling throughout your home.
Reduced Maintenance Costs With fewer breakdowns, you’ll save on repair expenses over time.

When Repairs Are Still an Option

  • The unit is less than 10 years old and has been well-maintained.
  • The repair needed is minor and doesn’t impede overall performance (e. g. , replacing a thermostat).
  • Your energy bills have remained consistent despite occasional malfunctions.

Final Thoughts

When deciding between repair and replacement, weigh factors such as age, performance issues, maintenance costs, and energy efficiency concerns. Consulting with an experienced HVAC professional can provide valuable insights tailored to your specific circumstances. Investing in a new system at the right time ensures long-term comfort while minimizing unexpected expenses down the road.

Mother and child with air conditioner remote Mother and child with air conditioner remote control. Comfortable temperature at family home. Cooling and heating device. Mom and kid on couch under cold breeze. Air conditioning on hot summer day. Aircon stock pictures, royalty-free photos & images

Signs You Need Immediate Repairs for Your Heating, Ventilation, and Air Conditioning System

Your HVAC system is crucial for maintaining comfort and air quality in your home or workplace. However, like any complex machine, it can develop issues over time. Knowing the signs that indicate immediate repairs are needed can save you from costly breakdowns or unsafe conditions.

Strange sounds like clanking, banging, whistling, or grinding are often a sign of internal problems.
Loose or damaged components: Screws, fans, or belts may be misaligned or broken.
Damaged motors: Worn-out bearings or malfunctioning parts inside the motor can create sharp noises.
Ductwork issues: Leaks in duct systems may lead to whistling sounds as air escapes.

Promptly addressing these noises can prevent further damage to your system’s internal components.

If you notice reduced airflow coming from your ducts even when the system is running at full capacity, this could point to several issues:
– Dirty air filters obstructing airflow. – Problems with the blower motor reducing efficiency. – Blockages in the ductwork caused by debris buildup or pests.

Regular maintenance such as cleaning filters and inspecting ducts can help avoid more significant problems.

Short cycling—when your HVAC unit turns on and off too frequently—can signal serious underlying concerns such as:
– A faulty thermostat providing incorrect temperature readings.
– Refrigerant leaks affecting cooling cycles. – Oversized systems that struggle to maintain a consistent temperature.

Ignoring this issue can increase energy bills and wear out components prematurely.

When some areas of your home are significantly warmer or cooler than others, it might be due to:
– Problems with the ductwork insulation. – Malfunctioning zone controls in multi-zone systems. – Aging equipment struggling to distribute air evenly.

Consulting an HVAC professional can help identify the root cause of inconsistent temperatures.

A sudden spike in utility costs despite no change in usage patterns often signals inefficiency within your HVAC system.
| Cause | Explanation| |———————–|—————————————-| | Dirty Coils | Dust buildup reduces heat exchange efficiency. | | Refrigerant Issues | Low refrigerant levels force the unit to work harder. | | Outdated Systems | Aging models consume more energy than modern counterparts.

Energy efficiency upgrades might be necessary if repairs alone do not address rising costs.

Strange smells coming through vents should never be ignored as they may indicate serious health hazards: – A burning smell may suggest overheating electrical components. – Musty odors could point to mold growth within ducts or unit interiors. – Rotten egg-like smells might mean gas leaks requiring urgent intervention.

Immediate professional inspection is essential when odors arise.

Proactive Steps for Maintenance

To reduce the risk of sudden issues requiring emergency repairs: 1. Schedule annual maintenance checks by certified HVAC technicians. 2. Replace filters regularly (every 1–3 months depending on usage). 3. Monitor energy bills for unexpected increases that signal performance problems. 4. Keep outdoor units clear of debris such as leaves and dirt for optimal airflow.

By acting quickly at the first sign of trouble, you’ll protect both your investment and indoor comfort while minimizing long-term repair costs.

Signs You Need Immediate Repairs for Your Heating, Ventilation, and Air Conditioning System

Identifying early warning signs of HVAC issues can save you from costly repairs and ensure your home stays comfortable year-round. While some problems may seem minor at first, ignoring them can lead to more significant system failures. Below are critical signs indicating that your HVAC system requires immediate attention.

Your HVAC system should operate relatively quietly.

  • Banging or clanking: This may indicate loose or broken internal components.
  • Hissing: Could signal a refrigerant leak.
  • Squealing or screeching: Often caused by worn-out belts or motor bearings.
  • Rattling: Points to debris in the unit or loose parts.

Addressing these issues promptly can prevent extensive damage to critical components.

If some rooms feel significantly warmer or colder than others despite consistent thermostat settings, your HVAC system might be struggling.

  • Leaky ductwork.
  • Malfunctioning thermostats.
  • An aging or undersized system.

A professional inspection is essential to diagnose and resolve the underlying issue effectively.

Possible Causes Impact on System
Dirty air filters Restricts airflow and strains the system
Refrigerant leaks Reduces cooling efficiency
Worn-out components Decreases overall performance

Routine maintenance and timely repairs can help reduce unnecessary energy consumption.

  • Blocked ductwork due to dirt, debris, or pests.
  • A failing blower motor.
  • Clogged filters restricting air movement.

An experienced technician can perform a thorough inspection and resolve any blockages or component failures affecting airflow.

Short cycling happens when your HVAC system turns on and off repeatedly without completing its heating or cooling cycle. This problem not only reduces comfort but also shortens the lifespan of the unit.

  • An improperly sized HVAC unit.
  • Refrigerant issues (low levels or leaks).
  • Faulty thermostats misreading temperatures.

Immediate attention is necessary to prevent long-term damage to your equipment.

  • Burning smells could point toward electrical issues like overheating wiring.
  • Musty odors suggest mold growth in ductwork due to excessive moisture.
  • Sewage-like smells might indicate problems with drainage systems connected to your unit.

A technician will assess potential causes and recommend solutions like cleaning ducts, repairing electrical faults, or addressing moisture concerns promptly.

Excess water pooling near your indoor AC unit often stems from clogged condensate drains or refrigerant leaks causing condensation outside normal boundaries. Left unchecked, moisture buildup can lead to mold growth and structural damage around the system’s location.

Timely intervention ensures not only that you avoid costly emergency repairs but also that you maintain optimal comfort indoors throughout every season of the year. Addressing these signs early with professional assistance extends the life of your HVAC equipment while keeping operational costs manageable over time.


Continue ReadingIdentifying Air Conditioner Issues and How an HVAC Contractor Woodbridge VA Can Help

Identifying Common Air Conditioning Issues with Your Trusted HVAC Contractor Woodbridge VA

Technician man installing an air conditioning in a client house, Young repairman fixing air conditioner unit, Maintenance and repairing concepts Technician man installing an air conditioning in a client house, Young repairman fixing air conditioner unit, Maintenance and repairing concepts Aircon stock pictures, royalty-free photos & images

Proper maintenance of your HVAC system is essential for its longevity and performance. However, even the most well-maintained systems can experience issues over time. Recognizing common air conditioning problems early can save you time and money, ensuring your home stays comfortable year-round. Below are some of the most typical HVAC issues, their causes, and practical solutions.

1. Uneven Cooling Throughout Your Home

Having rooms that are too warm while others feel overly cold is a frequent issue. Common causes include:
– Blocked or dirty vents
– Poor insulation in certain areas of the home
– Imbalanced ductwork

How to Fix It:
– Ensure all vents are clean and unobstructed by furniture or debris.
– Check for insulation issues in walls, attics, or crawl spaces and address any gaps or insufficient coverage.
– Hire a professional to assess your ductwork and adjust dampers as needed to balance airflow.

2. Thermostat Issues

A faulty thermostat can prevent your air conditioning unit from maintaining a stable temperature. Symptoms of a thermostat problem include:
– The system not turning on/off as expected
– Incorrect temperature readings on the thermostat display

How to Fix It:
– Replace batteries in battery-powered thermostats when needed.
– Make sure the thermostat is installed correctly and located away from heat sources like direct sunlight or appliances.
– Upgrade to a programmable or smart thermostat for better efficiency.

3. Restricted Airflow Due to Dirty Filters or Coils

Restricted airflow often leads to reduced cooling performance, increased energy bills, and sometimes system breakdowns. Causes include:
– Clogged air filters accumulating dust and debris over time
– Dirt buildup on evaporator coils

How to Fix It:
| Problem | Solution | Frequency |
|——————–|—————————————-|————————|
| Dirty Air Filters | Replace with new filters | Every 1–3 months |
| Dirty Coils | Clean coils with an approved cleaner | At least annually |

Regular maintenance keeps these components functioning efficiently.

4. Refrigerant Issues Leading to Poor Cooling Performance

Low refrigerant levels are another common problem that results in insufficient cooling power from your HVAC unit. This could be due to leaks in the system or improper installation during setup.

Warning Signs of Refrigerant Problems:
– Warm air blowing from vents despite setting a low temperature on the thermostat
– Ice buildup on refrigerant lines

Steps for Resolution:
1. Contact an HVAC professional to inspect refrigerant levels. 2. If leaks are identified, have them sealed immediately. 3. Refill refrigerant as recommended by manufacturer guidelines.

5. Electrical Failures Interrupting System Functionality

Electrical issues such as faulty wiring or worn-out capacitors can cause intermittent operation or prevent your AC from turning on entirely.

Key Indicators of Electrical Problems: – AC stops running suddenly without warning – Burning smell when the system operates

Solutions: Always consult a licensed technician for diagnosing electrical problems since attempting DIY repairs on electrical components can be hazardous.

By understanding these common air conditioning problems and applying proactive fixes, you’ll ensure greater efficiency and reliability from your HVAC system over time while avoiding costly emergency repairs altogether.

Understanding the Causes of No Cool Air Flowing from Your HVAC System and When to Seek AC Repair Woodbridge VA

When your HVAC system is not producing cool air, it can be both frustrating and uncomfortable, particularly during warm seasons. Several factors could contribute to this issue, ranging from simple fixes to more complex technical problems. Understanding these causes can help you identify the problem early and take appropriate steps to resolve it effectively.

Common Causes of No Cool Air Flow

  1. Dust and debris can accumulate on air filters over time, reducing airflow and efficiency.
  2. Restricted airflow can lead to inadequate cooling throughout your home.
  3. Low refrigerant levels due to leaks or improper charging prevent the cooling process from functioning effectively.
  4. Refrigerant problems often require professional intervention for proper diagnosis and repair.
  5. Incorrect thermostat settings, such as being set to “heat” instead of “cool,” could cause the system to blow warm or no air at all.
  6. Dead batteries in a programmable thermostat may also disrupt functionality.
  7. Obstructions in ductwork restrict airflow to different areas of your home.
  8. Leaks in ducts allow conditioned air to escape, reducing overall cooling efficiency.
  9. Insufficient airflow can cause evaporator coils to freeze, blocking further cooling.
  10. Frozen coils are often linked to dirty filters, refrigerant issues, or fan malfunctions.
  11. A malfunctioning compressor won’t be able to circulate refrigerant for cooling purposes.
  12. This issue generally requires professional repair or replacement.

Steps for Troubleshooting

  1. Ensure that your thermostat is set correctly (e.g., “Cool” mode) and at an appropriate temperature setting.
  2. Replace batteries if necessary.
  3. Remove dirty filters and replace them with clean ones every 1-3 months depending on usage.
  4. Clear away debris such as leaves or dirt around the condenser unit for optimal performance.
  5. Look for Ice Build-Up on Coils
    If ice is present:
    a) Turn off the system immediately and allow it time to defrost before restarting it again later after checking airflow paths are clean/unblocked

When Professional Help is Needed

Problem Type Recommended Action Why?
Refrigerant leak Call an HVAC technician Proper handling & recharge needed
Compressor failure Contact a licensed professional

Effective Solutions for Furnace Repair Woodbridge VA to Address HVAC Leaks

Refrigerant and water leaks are common issues that can affect the performance of your HVAC system. Left unaddressed, these problems not only reduce efficiency but can also lead to costly repairs. Here’s how you can effectively identify and resolve such leaks.

Detecting Refrigerant or Water Leaks During HVAC Installation Woodbridge VA

Refrigerant Leak Symptoms:

  • Weak cooling performance: The air conditioner struggles to reach the desired temperature.
  • Hissing or bubbling sounds: These noises point to a refrigerant escaping from small cracks or holes in the system.
  • Higher energy bills: A unit low on refrigerant works harder, consuming more electricity.
  • Frozen evaporator coils: Insufficient refrigerant can cause freezing on coils, disrupting airflow.

Water Leak Symptoms:

  • Puddles around the indoor unit: Water pooling near your HVAC system is a clear sign of a clog or leak.
  • Musty odors: Stagnant water encourages mold growth, leading to unpleasant smells.
  • Water stains on walls or ceilings: This suggests overflow from the condensate drain pan.

Understanding Causes of Leaks and When to Seek Emergency HVAC Service Woodbridge VA

  1. Damaged Lines or Connections
    Over time, connections in your HVAC system may weaken due to wear and tear, leading to cracks and leaks.
  2. Clogged Condensate Drain Line
    The condensate drain removes moisture collected during dehumidification. If it becomes blocked by dirt or algae, water backs up into the system.
  3. Corrosion in Components
    Corroded metal components may develop tiny holes where refrigerants can escape.
  4. Improper Installation
    Poorly connected refrigerant lines during installation often result in long-term issues.

Steps for Repairing Refrigerant Leaks

Handling refrigerants requires expertise as they are regulated substances with strict environmental standards.

  1. Contact a Certified Technician It’s essential to hire an EPA-certified professional who understands proper handling procedures for refrigerants.
  2. Conduct a System Inspection The technician will use tools like electronic leak detectors to locate and confirm leaks.
  3. Seal Small Leaks For minor damage, technicians might utilize sealants designed for HVAC systems as a temporary fix.
  4. Replace Faulty Components In cases of significant damage (e.g., worn-out coils), replacing affected parts is necessary rather than patching them up repeatedly.
  5. Recharge Refrigerant Levels Once repairs are made, technicians will recharge your system with refrigerants according to manufacturer specifications for optimal functionality.

Steps for Repairing Water Leaks

  1. Use a wet/dry vacuum or pipe cleaner tools to remove blockages from the drain line.
  2. If rust has compromised your condensate pan’s integrity, replace it with a new one rather than attempting temporary fixes like tapes.
    • Verify that all lines and pipes are fitted correctly during installation if recurring leaks occur soon after purchase.
    • Installing float switches can help shut off your unit when excessive water is detected before damaging other parts of your home.

Preventive Maintenance Tips

  • Schedule regular inspections with licensed HVAC professionals at least twice annually.
  • Keep air filters clean as clogged filters strain components unnecessarily.
  • Ensure proper airflow by keeping vents clear from obstructions such as furniture or dust buildup.
  • Inspect drain pans periodically for signs of rusting and replace them proactively if needed.

By responding promptly to any signs of leakage while maintaining routine care measures outlined above ensures efficient operation throughout its lifespan without disruptions caused by breakdowns frequently seen otherwise due neglect over time.

air con condenser A view of an air conditioner condenser unit in the backyard of a home. Aircon stock pictures, royalty-free photos & images

Reasons Your Air Conditioner is Blowing Hot Air and How to Resolve It

When your air conditioner starts blowing hot air instead of cold, it disrupts your comfort and could signify serious issues with the unit. This problem can stem from various causes, ranging from simple fixes to more complex repairs requiring professional help. Below, we’ll explore the common reasons for this issue and actionable steps you can take to resolve it.

Common Causes of an HVAC Unit Blowing Hot Air

  1. The thermostat may be incorrectly set to “heat” instead of “cool.”
  2. Dead or low batteries can cause the thermostat to malfunction.
  3. Incorrect temperature settings might also prevent proper cooling.
  4. Clogged filters restrict airflow, reducing cooling efficiency.
  5. Dirt buildup can overwork the compressor, leading the system to blow warm air.
  6. Low refrigerant levels due to leaks can hinder cooling performance.
  7. Insufficient refrigerant prevents heat exchange, resulting in warm air output.
  8. Faulty wiring or a tripped circuit breaker may stop key components like the compressor from functioning correctly.
  9. Damaged capacitors or relays may disrupt smooth operation of the system.
  10. Outdoor condenser coils covered in dirt or debris cannot release heat effectively, causing warm airflow indoors.
  11. A failing compressor struggles to circulate refrigerant and maintain effective cooling cycles.

Steps to Fix an Air Conditioner Blowing Hot Air

  • Ensure that it is set to “cool” mode with an appropriate temperature below room levels.
  • Replace batteries if needed and verify that the fan setting is on “auto” instead of “on.”
  • Inspect filters monthly for dust buildup.
  • Replace disposable filters every 1-3 months or clean washable ones as per manufacturer instructions.
  • If you suspect a refrigerant leak due to reduced efficiency or ice on refrigerant lines, contact a licensed technician.
  • Recharging refrigerant requires professional handling due to environmental regulations.
  1. Reset Breakers and Inspect Electrical Components: | Problem | Solution | |————————-|——————————————-| | Tripped breaker | Locate your breaker box and reset any tripped switch connected to your HVAC unit | | Faulty capacitor/relay | Consult a certified technician for replacement |
  2. Clean Condenser Coils: Steps: 1) Turn off power before cleaning outdoor units. 2) Use a garden hose or coil cleaner recommended by the manufacturer. 3) Remove large debris manually, if safely accessible.
  3. Schedule Annual Maintenance Checks: Preventative maintenance ensures all components—from compressors to ducts—are in peak condition while reducing risks associated with worn-out parts.

When Professional Assistance is Necessary

  • Persistent leaks of refrigerant after recharge attempts.
  • Electrical failures that pose safety hazards during troubleshooting.
  • Compressor malfunctions requiring part replacements or complex diagnostics.

Timely intervention by an HVAC specialist not only restores functionality but also extends your system’s lifespan while maintaining energy efficiency standards for optimal performance year-round.

Addressing why your air conditioner blows hot air involves systematic troubleshooting combined with regular upkeep practices tailored for long-term reliability across seasonal demands.

Identifying Why Your HVAC System is Freezing and Steps for Repair

A freezing HVAC system can cause major disruptions in maintaining a comfortable indoor environment. Understanding why your system freezes and knowing the steps to fix it can save you time, money, and further complications. Below, we explore the common causes of an HVAC freeze-up and provide actionable repair strategies.

Common Reasons Your HVAC System Might Freeze

  1. Dirty Air Filters: A clogged air filter restricts airflow, causing the evaporator coil to freeze due to ineffective heat exchange.
  2. Blocked Vents or Ductwork: Obstructions in vents or ducts prevent proper airflow throughout the system.
  3. Insufficient refrigerant causes a drop in pressure within the evaporator coils, leading them to cool excessively and freeze up.
  4. Incorrect thermostat settings may overwork the system, forcing it to operate under suboptimal conditions.
  5. Faulty blower fans or damaged components like expansion valves can impair heat exchange efficiency.
  6. High humidity levels or blocked condensate drain lines cause excess moisture on the evaporator coils that can freeze when exposed to cold temperatures.

Step-by-Step Guide for Diagnosing and Fixing a Freezing HVAC System

  1. Power down the system immediately to prevent further damage.
  2. Allow ice buildup on coils to melt completely before investigating further.
  3. Check if the air filters are dirty or clogged.
  4. Replace filters every 30–90 days depending on usage and environmental conditions.
  5. Low refrigerant levels require professional servicing.
  6. Avoid attempting DIY refills as improper handling could damage your system or pose health risks.
  7. Dirty evaporator coils should be cleaned using coil cleaner spray.
  8. Ensure regular maintenance to prevent debris buildup.
  9. Examine ductwork for obstructions such as dust, debris, or pests.
  10. Ensure registers are open and not obstructed by furniture or curtains.
  11. Verify that the thermostat is correctly set according to seasonal needs (cooling vs heating).
  12. Upgrade older thermostats if they malfunction frequently.
  13. Inspect Drain Lines | Problem | Solution | |—————————|————————-| | Clogged condensate line | Use a wet/dry vacuum to remove blockages | | Mold growth in drain line | Clean with vinegar solution |
  14. Call an HVAC Technician If Necessary If mechanical failures (e.g., blower motor problems) are identified, contact a licensed professional for repairs.

Tips to Prevent Future Freeze-Ups

  • Schedule regular maintenance checks with an HVAC technician at least twice annually.
  • Keep outdoor units free from debris like leaves or dirt that could obstruct airflow.
  • Invest in a dehumidifier if you live in a region with high humidity levels.
  • Monitor refrigerant levels during routine service calls by professionals.

Addressing freezing issues promptly not only restores optimal performance but also extends the lifespan of your HVAC system while improving energy efficiency over time.

Troubleshooting Weird Noises in Your HVAC System and Their Underlying Causes

Weird noises coming from your HVAC system can be both annoying and indicative of deeper issues that require attention. Ignoring these sounds could lead to costly repairs or even complete system failure. Here’s how to identify common noises, understand their underlying causes, and address them effectively.

Common HVAC Noises and Their Potential Causes

  1. Cause: This typically indicates a loose or broken part within the compressor or blower assembly, such as a connecting rod, crankshaft, or fan blade.
  2. Fix: Shut off the system immediately to prevent further damage. A technician may need to inspect and secure or replace the damaged part.
  3. Cause: Squealing usually points to a worn-out belt between the motor and blower or issues with motor bearings.
  4. Fix: Replace the belt if it’s frayed or slipping. Lubricate motor bearings if possible, but professional maintenance is often required for more severe wear.
  5. Cause: A low hum can indicate electrical problems such as a failing capacitor, loose wiring connections, or an overloaded motor.
  6. Fix: Turn off the power supply immediately to avoid electrical hazards. Contact an HVAC professional to assess and repair electrical components.
  7. Cause: Rattling often arises due to loose screws, bolts, or debris trapped in the unit’s interior components.
  8. Fix: Inspect exterior panels and internal parts for looseness or debris accumulation. Tighten screws and clean out any obstructions carefully.
  9. Cause: This noise is usually associated with ductwork expanding and contracting as it adjusts to temperature changes.
  10. Fix: While this isn’t always serious, using flexible duct connectors can reduce sound transmission throughout the ductwork.
  11. Cause: Whistling indicates restricted airflow caused by blocked vents, dirty air filters, or poorly fitted ducts.
  12. Fix: Check air filters regularly (every 1-3 months) and replace them when needed. Ensure vents are open and unobstructed.

Preventative Maintenance Tips

To minimize strange noises from developing in your HVAC system: – Schedule regular maintenance checks (ideally twice per year). – Replace air filters frequently based on manufacturer recommendations. – Verify that all screws, bolts, and fasteners are properly secured during inspections. – Clean your ducts every few years to avoid blockages that increase strain on the unit. – Listen closely after servicing for any abnormal sounds that may indicate overlooked issues.

Quick Reference Table for Noise Types

Noise Type Likely Cause Recommended Action
Banging/Clanking Loose/broken internal part Shut off system; seek professional help
Squealing Worn belt/motor bearing issues Replace belt; lubricate bearings
Humming Electrical problem Contact an HVAC technician
Rattling Loose screws/debris Tighten screws; remove obstructions
Whistling Restricted airflow Clean/replace filter; clear vents

By promptly identifying unusual noises in your HVAC system and taking appropriate action based on their cause, you can ensure efficient operation while avoiding costly repairs over time.

Troubleshooting Weird Noises in Your HVAC System and Their Underlying Causes

Strange noises coming from your HVAC system can be both frustrating and indicative of underlying issues. Ignoring these sounds may lead to further damage, increased repair costs, or even system failure. Below is an overview of common noises, their potential causes, and actionable steps for troubleshooting.

Common HVAC Noises and Their Potential Causes

  1. Cause: This sound often signals a loose or broken part inside the compressor, such as a piston pin or connecting rod.
    • Turn off the system immediately to avoid further damage.
    • Call a professional technician to inspect and replace damaged components.
  2. Cause: Worn-out belts or motor bearings typically cause these high-pitched noises.
    • Inspect the belt for wear and ensure it’s properly aligned on the pulleys.
    • Lubricate motor bearings if possible. If the noise persists, consult a certified technician.
  3. Cause: Loose screws, bolts, or debris within the unit can cause rattling sounds.
    • Tighten any loose components around the blower motor or air handler.
    • Remove debris obstructing airflow within ductwork.
  4. Cause: Air escaping due to leaking ductwork or refrigerant leaks in your HVAC system.
    • Inspect duct joints for gaps and seal them using aluminum tape or mastic sealant.
    • For refrigerant leaks, contact an EPA-certified professional to repair and recharge the system.
  5. Cause: Electrical issues such as faulty wiring, failing capacitors, or a malfunctioning compressor relay can produce this sound.
  6. Solution:
    • Turn off power to the unit immediately if you suspect electrical issues.
    • Have a licensed electrician inspect wiring connections and replace defective electrical components.

Quick Troubleshooting Checklist

Noise Type Possible Cause Action Required
Banging/Clanking Loose/broken parts in compressor Shut down system & call professional
Squealing/Screeching Worn-out belt/motor bearings Inspect belt/ lubricate bearings
Rattling Loose screws/debris inside unit Tighten screws & remove debris
Hissing Air/refrigerant leaks Seal duct leaks; consult pro for refrigerant
Buzzing Electrical malfunctions Power off system; check wiring

Best Practices for Preventive Maintenance

  • Schedule regular inspections by certified HVAC technicians at least twice a year (before summer/winter).
  • Clean and replace air filters every 1–3 months to prevent strain on moving parts.
  • Keep outdoor units free of obstructions like leaves, dirt, and snow buildup that could interfere with normal operation.
  • Check for unusual vibrations after installation; improper mounting can lead to recurring noise problems.

Addressing unusual sounds promptly will not only extend your HVAC unit’s lifespan but also improve energy efficiency and indoor comfort levels while reducing long-term costs associated with deferred maintenance.


Continue ReadingIdentifying Common Air Conditioning Issues with Your Trusted HVAC Contractor Woodbridge VA

How to Choose the Best HVAC Contractor Woodbridge VA for Your Heating and Cooling Repair Needs

Man hand hold air conditioner filter cleaning concept. Man hand hold air conditioner filter cleaning concept. Aircon stock pictures, royalty-free photos & images

Selecting the right HVAC contractor is crucial to ensure your heating and cooling systems are repaired efficiently and effectively. With countless options available, it’s essential to approach the decision-making process with careful research and consideration. Below are some key factors to evaluate when choosing an HVAC contractor for your repair needs.

Licensing and Certification

One of the first things to verify is whether the contractor holds the appropriate licenses and certifications required by your state or region. Licensed professionals are more likely to deliver reliable services as they adhere to local codes and regulations. Certifications from organizations like North American Technician Excellence (NATE) indicate advanced knowledge and expertise in HVAC systems.

Experience Matters

An experienced contractor will have a deeper understanding of various HVAC brands, models, and complex repair challenges. Look for companies that have been in business for several years or inquire about their technicians’ individual experience levels.

Insurance Coverage

Always choose a contractor who carries both liability insurance and workers’ compensation coverage. Liability insurance protects you from financial losses caused by accidental property damage, while workers’ compensation ensures you’re not held responsible for injuries sustained by workers on your property.

Services Offered

Not all contractors provide comprehensive HVAC repair services. Confirm that the company specializes in repairs for both heating (furnaces, heat pumps) and cooling (air conditioners) systems. This ensures they can handle your specific needs without outsourcing parts of the job, which could lead to delays or inconsistent quality.

References and Reviews

Online reviews can help you gauge customer satisfaction with a particular contractor’s services. Additionally, ask the contractor for references so you can speak directly with past clients about their experiences.
– Was the work completed on time?
– Did they stick to the budget provided?
– Were there any issues after repairs were made?

Clear Estimates

Request detailed written estimates before committing to a contractor’s services.
– Cost of labor
– Price of replacement parts or materials needed
– Expected timelines for repair

Avoid contractors who give vague estimates or refuse to provide documentation upfront.

Factor Why It Matters What To Look For
Licensing Ensures adherence to local codes State-required licensure
Certifications Indicates technical expertise NATE certification
Insurance Protects against liability risks Liability & workers’ compensation coverage
References/Reviews Offers insight into reputation Positive feedback from prior clients
Written Estimates Ensures transparency & no hidden costs Detailed breakdown of costs

Red Flags To Watch For

  • High-pressure sales tactics pushing unnecessary upgrades or replacements.
  • Unwillingness to provide references or proof of insurance/licensing.
  • Extremely low bids compared to competitors (this could be indicative of subpar service).
  • Poor communication throughout initial consultations.

Taking these precautions will help ensure you hire a reputable HVAC professional capable of delivering high-quality repairs tailored to your home’s heating and cooling needs.

Hiring the right HVAC repair contractor is vital to ensuring your heating and cooling systems are repaired efficiently and reliably. Below are some key questions you should ask to evaluate a potential contractor.

Licensing ensures they meet professional standards and regulations.

2. How Much Experience Do You Have?

Experience matters when hiring for HVAC repairs. Ask how long they’ve been in business and whether they have worked on systems similar to yours.

Request references from previous clients or check online reviews on platforms like Google, Yelp, or Better Business Bureau (BBB). Positive feedback from past customers can help validate the quality of their work and customer service.

4. What Types of HVAC Systems Do You Specialize In?

Not all contractors are familiar with every type of heating or cooling system. Confirm whether the contractor has expertise in repairing your specific type or brand of system, such as central air conditioners, heat pumps, furnaces, or ductless mini-split units.

This document should outline labor costs, parts, warranties, and any potential additional fees so you can avoid hidden costs later.

Sample Table: What to Look for in Written Estimates
Item What It Should Include
Labor Costs Hourly rates or flat fees for service
Parts Pricing List of components required for repair
Warranty Terms Coverage period and what is included (labor/parts)
Additional Fees Possible charges for emergency service or after-hours repairs

6. What Warranties Do You Offer?

Reputable contractors often back up their services with warranties on both parts and labor.

7. How Long Will the Repairs Take?

Timeframes can vary based on the complexity of repairs needed. Asking about estimated completion times helps you plan accordingly while ensuring expectations are clear upfront.

8. Are There Financing Options Available?

Some major HVAC repairs can be expensive upfront costs. If needed, inquire whether financing plans are available so you can budget effectively without compromising quality service.

Key Takeaways for Furnace Repair Woodbridge VA

  • Verify licensing/insurance details.
  • Check experience levels.
  • Request references/reviews.
  • Understand cost breakdowns through written estimates.
  • Confirm expertise with your specific HVAC system type.
  • Review warranties offered for parts/labor.
  • Clarify timelines and financing options where applicable.

This thorough vetting process not only minimizes risks but also increases your chances of finding a reliable contractor who meets your needs effectively.

air conditioning engineer An air conditioning engineer is finishing the installation of several units on a rooftop. Two colleagues can be seen also installing units in the background. They are wearing hi vis jackets, hard hats and safety goggles. Aircon stock pictures, royalty-free photos & images

How to Choose the Right Contractor for HVAC Installation Woodbridge VA

When faced with a broken HVAC system, it’s natural to want repairs completed quickly and at a low cost. However, opting for the lowest bidder on your HVAC repair project can lead to long-term issues that far outweigh any immediate cost savings. Below, we’ll explore why choosing the cheapest option is often a risky decision and provide insights into what you should prioritize instead.

Hidden Costs of Low Bids

  1. Inferior Quality Materials:
    The lowest bid often reflects the use of cheaper, lower-quality components that may not last as long or function as efficiently. Over time, this can lead to frequent breakdowns and increased repair costs.
  2. Lack of Expertise:
    Contractors offering significantly lower bids may lack the necessary certifications, training, or experience required for quality repairs. This could result in improper installations or subpar fixes.
  3. Incomplete Repairs:
    In some cases, contractors proposing low bids might cut corners by addressing only surface-level issues rather than identifying and resolving root causes.
  4. Warranty Limitations:
    Many low-cost contractors don’t offer robust warranties on their work or materials — leaving you responsible for future problems that might arise.

What Does a Low Bid Typically Indicate?

Indicator Possible Risks Long-Term Impact
Unrealistically Low Prices Use of unlicensed workers Substandard workmanship
Shorter Timeframes Rushed jobs with oversight errors Reduced efficiency of your system
Minimal Warranty Coverage Limited accountability if issues arise Increased expenses for rework

While it might be tempting to save money upfront with a low bid, these risks often result in higher costs down the line due to repeated repairs or complete system replacements sooner than expected.

Qualities That Matter More Than Cost

  • Experience:Look for contractors with proven expertise in diagnosing and repairing HVAC systems similar to yours.
  • Certifications & Licensing:Verify that your chosen professional holds necessary certifications such as NATE (North American Technician Excellence) or state-specific licenses.
  • Reputation & Reviews:Research customer reviews online to evaluate the contractor’s reliability and quality of work.
  • Warranty Offerings:A solid warranty shows confidence in their workmanship and provides peace of mind.
  • Detailed Estimates:Ensure you receive an itemized estimate outlining labor costs, materials used, and project scope — this transparency helps avoid unexpected fees later on.

Benefits of Avoiding Low Bids

  • Improved energy efficiency due to proper system calibration and installation techniques.
  • Fewer breakdowns requiring emergency service calls.
  • Greater overall satisfaction with consistent indoor comfort levels.

While it’s important to stay within budget, selecting an experienced contractor who offers fair pricing based on value ensures your heating and cooling system performs optimally in the long run.

How to Choose the Best Emergency HVAC Service Woodbridge VA by Checking Online Reviews

When choosing an HVAC repair service, online reviews can provide critical insights into the quality of work, customer service, and overall reliability of a contractor. Reviews from past customers act as a virtual word-of-mouth and can help you make an informed decision. Here’s why checking online reviews is essential and how to use them effectively.

Benefits of Checking Online Reviews

  • Authenticity: They provide firsthand accounts of customer experiences, helping you get a realistic understanding of what to expect.
  • Transparency: Reviews can shed light on how contractors handle both routine maintenance and unexpected issues.
  • Red Flags: Negative feedback can alert you to recurring problems or poor practices, such as missed appointments or incomplete repairs.
  • Comparative Information: By reading multiple reviews across different contractors, you can identify trends in service quality and professionalism.

What to Look for in HVAC Contractor Reviews

Not all reviews are equally helpful.

  1. Look at the contractor’s average rating across platforms such as Google, Yelp, or Better Business Bureau (BBB). A high cumulative score is often a good indicator of overall satisfaction.
  2. Pay attention to patterns in the comments rather than focusing solely on individual experiences. If multiple customers praise prompt service or criticize communication issues, these trends are likely accurate reflections of the contractor’s practices.
  3. Prioritize reviews that describe specific issues or projects instead of vague statements like “Great service. ” Detailed feedback offers actionable insights into what went well—or poorly—during past jobs.
  4. HVAC technology evolves over time, so focus on recent feedback to ensure that it reflects the contractor’s current expertise and approach.

Red Flags in HVAC Service Reviews

  • Complaints about hidden fees or surprise charges after work is complete.
  • Multiple mentions of missed deadlines or tardiness.
  • Poor communication during scheduling or project updates.
  • Reports of unprofessional behavior by technicians.
Criteria Positive Traits Red Flags
Customer Service Polite staff; responsive team Rude interactions; lack of updates
Quality of Work Thorough diagnosis; lasting fixes Frequent callbacks for repairs
Timeliness On-time arrival; quick resolution Missed appointments; delays
Transparency Clear pricing; honest estimates Hidden costs; vague explanation

Best Practices for Using Online Reviews Effectively

  1. Check multiple platforms like Google My Business, Angi (formerly Angie’s List), Yelp, and BBB.
  2. Avoid relying solely on star ratings—read through individual comments for context.
  3. Combine review research with other vetting tools such as referrals from friends or family members.
  4. Be wary if most positive reviews appear overly generic—it could indicate fake testimonials.

By leveraging reliable online reviews alongside other research methods, you increase your chances of hiring an HVAC contractor who delivers quality results while meeting your unique needs efficiently and professionally.

How a Professional Home Inspection Can Identify Critical HVAC Repair Needs

When it comes to maintaining your HVAC system, professional home inspections play a crucial role in identifying potential issues before they turn into costly repair projects. A comprehensive inspection not only ensures the functionality of your heating and cooling systems but also helps improve energy efficiency, comfort, and safety in your home. In this article, we’ll delve into how a professional inspection can uncover key HVAC repair needs.

What Does an HVAC Inspection Include?

An HVAC inspection involves a thorough evaluation of your heating, ventilation, and air conditioning systems. Professional inspectors assess all components for wear and tear, damage, or inefficiencies.

  • Thermostat Calibration:Verifying that the thermostat is functioning correctly and accurately maintaining desired temperatures.
  • Air Filter Check:Inspecting air filters for blockages or dirt buildup that can reduce airflow and put strain on the system.
  • Ductwork Inspection:Checking for leaks, blockages, or improper insulation in duct systems that may affect air distribution.
  • Electrical Connections:Examining wiring and connections to ensure there are no safety hazards or faulty components.
  • Heat Exchanger Condition:Inspecting the heat exchanger for cracks or corrosion that may lead to carbon monoxide leaks.
  • Refrigerant Levels:Ensuring refrigerant levels are adequate to maintain proper cooling performance in your air conditioner.

Common Issues Identified During Inspections

  1. Dirty Coils– Reduced efficiency due to buildup on evaporator or condenser coils.
  2. Leaky Ducts– Air escaping through gaps or holes in ducts significantly impacts energy efficiency.
  3. Worn Belts– Loose or damaged belts in older systems may lead to mechanical failure.
  4. Clogged Condensate Drains– Blocked drains can cause water damage or mold growth.
  5. Aging Components– Parts nearing the end of their lifespan may require replacement to avoid system breakdowns.

By addressing these issues promptly, you can help extend the life of your HVAC system while minimizing unexpected repair costs.

Benefits of Regular Inspections

  • Improved energy efficiency that lowers monthly utility bills.
  • Enhanced indoor air quality by identifying issues like dirty filters or mold growth in ducts.
  • Prolonged lifespan of HVAC components through preventive maintenance.
  • Safer operation by avoiding risks like electrical malfunctions or carbon monoxide leaks.

Sample Checklist for an Effective Inspection

Component Issue Checked For Action Required
Thermostat Proper calibration Adjust settings if needed
Filters Dirt buildup Clean/replace filters
Ductwork Leaks/blockages Seal leaks/reinsulate ducts
Electrical Components Loose wires/corrosion Secure/balance connections
Refrigerant Levels Undercharging/overcharging Refill/remove excess refrigerant

This checklist ensures every critical component is evaluated systematically.

Final Thoughts

Investing in professional home inspections is one of the best ways to safeguard the performance and durability of your HVAC system. By catching repair needs early, you not only prevent costly emergencies but also create a healthier living environment for yourself and your family year-round.

Split air conditioner on a white wall. Split air conditioner on a white wall. Closeup image. Aircon stock pictures, royalty-free photos & images

Comparing Multiple Contractors to Find the Best Solution for Your HVAC Repair

When faced with HVAC repair needs, selecting the right contractor can make all the difference in ensuring high-quality service and long-term reliability. Comparing multiple contractors is a crucial step that helps you evaluate your options and choose the company best suited to meet your requirements. Below are key considerations and strategies to guide you in making an informed decision.

Benefits of Comparing Contractors

  • Better Pricing: Gathering multiple quotes allows you to understand market rates and avoid overpaying.
  • Service Quality: Evaluating contractors’ expertise ensures you get skilled professionals for the job.
  • Tailored Solutions: Different contractors may offer varied approaches, allowing you to choose one aligned with your needs.
  • Transparency: Interacting with several companies helps identify transparent and customer-focused services.

Steps to Compare HVAC Contractors

  1. Request Multiple EstimatesObtain written estimates from at least three contractors.
  2. A breakdown of labor costs
  3. Equipment or parts required
  4. Anticipated timeline for completion

Use this information not only to compare pricing but also to assess service details.

  1. Review Licenses and Certifications Verify that each contractor:
  2. Holds the necessary licenses specific to your state or locality
  3. Has certifications such as NATE (North American Technician Excellence) or EPA 608 Certification
  4. Check Online ReviewsCompare online reviews across platforms like Google, Yelp, and Better Business Bureau (BBB).
  5. Timeliness of service
  6. Professionalism of technicians
  7. Quality of repairs performed
  8. Evaluate Warranties OfferedCompare warranties provided by each contractor on both labor and replacement parts. A strong warranty reflects a company’s confidence in their work.
  9. Assess Communication Skills During initial consultations, consider how well each contractor communicates:
  10. Are they clear in explaining technical issues?
  11. Do they answer questions thoroughly without pressuring sales?

Key Metrics for Comparison

Criteria Contractor A Contractor B Contractor C
Price Estimate $_____ $_____ $_____
License Verified Yes/No Yes/No Yes/No
Online Ratings ★★★ / 5 ★★★★ / 5 ★★★★★ / 5
Warranty Length ______Years ______Years ______Years
Availability Timeline ______Weeks ______Weeks ______Weeks

Use this table as a template to organize information from each contractor so that you can easily compare them side-by-side.

Red Flags to Avoid

  • Unusually low estimates compared to competitors (may indicate poor quality or hidden fees)
  • Lack of proper credentials or certifications
  • Vague answers when discussing warranties or repair methods
  • Negative customer reviews mentioning unresolved issues

Final Thoughts on Making an Informed Choice

Choosing the best HVAC repair solution requires careful evaluation of all available options. By comparing estimates, credentials, reviews, warranties, and communication styles, you can identify a trustworthy contractor who delivers reliable results without compromising on quality or transparency.


Continue ReadingHow to Choose the Best HVAC Contractor Woodbridge VA for Your Heating and Cooling Repair Needs

Recognizing the Common Signs That Your Furnace Needs Immediate AC Repair Woodbridge VA

Remote control with a display in a woman's hand on background of an air conditioner on a gray wall A remote control with a display showing a temperature of 20 degrees Celsius in a woman's hand in the foreground against the background of an air conditioner on a gray wall Aircon stock pictures, royalty-free photos & images

A properly functioning furnace is essential for maintaining comfort during colder months. However, furnaces are not immune to wear and tear, and identifying early signs of trouble can save you from costly repairs or replacements later. Below are some key indicators that your furnace may need immediate attention.

Inconsistent or Insufficient Heating

One of the most apparent signs that there’s an issue with your furnace is uneven heating across your home. If you notice cold spots in certain rooms while others are adequately warm, it could point to:
– A failing thermostat
– Blocked vents or ducts
– Issues with the furnace’s blower motor

Additionally, if your furnace struggles to maintain the set temperature or takes longer than usual to heat your home, it may signal a problem with the heating elements or gas supply.

Unusual Noises

Modern furnaces typically operate quietly, so any loud or persistent sounds are reason for concern. Common noises and their potential causes include:
Banging: Could indicate loose components or internal damage.
Rattling: May suggest debris in the system or structural issues like a cracked heat exchanger.
Squealing: Often linked to worn-out belts or motor bearings.

Ignoring these sounds could lead to more severe problems down the line.

Increased Energy Bills

A spike in energy costs without a significant change in usage is often tied to an inefficient furnace. Factors contributing to increased consumption may include:
– A dirty air filter restricting airflow
– Leaking ductwork causing heat loss
– An aging system that struggles to perform efficiently

Regular maintenance can help prevent these issues and keep utility bills under control.

Frequent Cycling On and Off

If your furnace cycles on and off more frequently than usual (a condition known as short cycling), this could signify problems such as:
– A clogged air filter affecting airflow
– Thermostat malfunctions causing improper signals
– Overheating due to internal blockages

Short cycling not only disrupts comfort but also places excessive strain on the system, reducing its lifespan.

Strange Odors Coming from Vents or Unit

While it’s normal for a furnace to emit a slight burning smell when first turned on for the season (caused by dust burning off), persistent odors could indicate issues such as:
| Odor Type | Potential Cause | Recommended Action | |——————–|———————————-|—————————————| | Burning smell | Electrical problem | Shut off power; call a technician | | Rotten egg smell | Gas leak | Leave home immediately; contact utility company & HVAC professional | | Musty odor | Mold in ducts | Schedule duct cleaning |

Addressing unusual smells promptly ensures safety and proper functionality.

Yellow Pilot Light Instead of Blue

For gas-powered furnaces with pilot lights, a blue flame indicates efficient combustion. If this light turns yellow, it might suggest poor ventilation or carbon monoxide presence—a dangerous situation requiring immediate attention from a professional.

The Importance of Timely Furnace Repair Woodbridge VA

Delaying necessary repairs can exacerbate existing problems and lead to complete system failure. By recognizing these warning signs early on and seeking professional assistance promptly, you can extend the life of your furnace while ensuring optimal performance throughout its operational lifespan.

A Comprehensive Guide to HVAC Installation Woodbridge VA and Knowing When to Replace Your Heat Pump System

Heat pump systems are an essential component of many residential and commercial HVAC setups, providing efficient heating and cooling throughout the year. However, like all mechanical systems, heat pumps have a finite lifespan. Knowing when it is time to replace your heat pump system can save you from rising energy bills, unexpected breakdowns, and inefficient operation. Below is a detailed guide to help identify the signals that indicate your heat pump may need replacement.

How to Know When You Need Emergency HVAC Service Woodbridge VA for Your Heat Pump

  1. The average lifespan of a heat pump ranges between 10–15 years with proper maintenance.
  2. If your system is approaching or surpassing this age range, it may be time to consider a replacement.
  3. Are you calling for repairs more often than usual? Multiple service visits within a short period suggest that the system might be nearing the end of its life.
  4. Compare cumulative repair costs against the price of upgrading to a new unit.
  5. Higher-than-usual energy bills could signal that your heat pump is working harder than necessary due to wear and tear.
  6. Check for uneven heating or cooling within your space as an additional indicator.
  7. Persistent grinding, squealing, or rattling noises often indicate serious internal issues.
  8. Musty odors could point to mold growth or damaged components that are difficult or expensive to repair.
  9. If certain rooms remain too hot in summer or too cold in winter despite tweaking settings, it could mean your heat pump can no longer perform efficiently.

Factors to Consider Before Replacing

Factor Why It Matters
Energy Efficiency Rating (SEER/HSPF) Newer models offer improved Seasonal Energy Efficiency Ratios (SEER) and Heating Seasonal Performance Factors (HSPF), leading to lower operational costs.
Maintenance History Systems with regular tune-ups tend to last longer but still need eventual replacement.
Size Compatibility Ensure the new unit is properly sized for your home; undersized or oversized units reduce efficiency.
Technological Upgrades Modern systems come with smart thermostats and variable-speed motors for better comfort control.

Benefits of Replacing an Outdated Heat Pump

  • Lower Energy Bills: Modern heat pumps are designed for higher efficiency using updated technologies such as variable speed compressors. This reduces overall electricity consumption.
  • Improved Comfort: Newer units ensure even temperature distribution throughout your home while maintaining optimal humidity levels.
  • Reduced Environmental Impact: Many older systems use refrigerants like R-22 (Freon), which are being phased out due to their harmful environmental effects. Upgrading guarantees compliance with current regulations.
  • Enhanced Reliability: A new system minimizes the risk of unexpected breakdowns during extreme weather conditions.

Proactive Maintenance Tips Moving Forward

  • Schedule professional maintenance twice annually—before summer and winter seasons start.
  • Clean filters regularly (monthly checks) and replace them as needed.
  • Monitor refrigerant levels and inspect coils for debris buildup.
  • Keep surrounding areas clear from obstructions such as plants or furniture blocking airflow.

Identifying when it’s appropriate to replace your heat pump ensures both financial savings and enhanced indoor comfort over time while avoiding costly surprises due to failure at critical moments.

Hvac technician performing air conditioner maintenance inspection. Hvac technician performing air conditioner maintenance inspection. 24 hours emergency air conditioning breakdowns and failures repair service. Home insurance. Aircon stock pictures, royalty-free photos & images

A Comprehensive Guide to Identifying When to Replace Your Heat Pump System

Heat pumps are an essential component of many HVAC systems, offering efficient heating and cooling solutions for homes and businesses. However, like any mechanical system, they have a finite lifespan and will eventually require replacement. Below is a comprehensive guide to help you determine when it’s time to replace your heat pump.

Signs Your Heat Pump May Need Replacement

  • Inconsistent Temperatures
    If your home has uneven heating or cooling, it may be a sign that your heat pump is struggling to maintain the desired temperature.
  • Frequent Repairs
    Frequent breakdowns or recurring issues, such as refrigerant leaks or electrical malfunctions, can signal that the system is reaching the end of its life.
  • Rising Energy Bills
    A sudden increase in energy costs without a significant change in usage could point to declining efficiency in your heat pump.
  • Unusual Noises
    Strange sounds like grinding, rattling, or hissing are often indicative of worn-out components.

Factors That Determine Replacement vs. Repair

Factor Repair Recommended Replacement Recommended
Age of System Less than 10 years More than 10–15 years
Cost of Repair Below 50% of replacement cost Over 50% of replacement cost
Efficiency Level High efficiency after repair Low efficiency even after repair

Benefits of Replacing an Old Heat Pump

  1. Improved Energy Efficiency: Modern models come with advanced technologies like variable-speed compressors and higher SEER (Seasonal Energy Efficiency Ratio) ratings for better performance and lower utility bills.
  2. Better Indoor Comfort: Upgraded systems regulate temperature more effectively while also enhancing humidity control.
  3. Fewer Repairs: New units often come with warranties and require less frequent maintenance compared to aging models.
  4. Environmental Benefits: Many contemporary systems use eco-friendly refrigerants that reduce greenhouse gas emissions.

Selecting the Right Replacement Model

  • Capacity Requirements: Ensure the unit matches your home’s heating and cooling demands by consulting with an HVAC professional who can perform proper load calculations.
  • Energy Efficiency Ratings: Look for high SEER and HSPF (Heating Seasonal Performance Factor) ratings for maximum savings.
  • Compatibility with Existing Systems: If you’re not upgrading your entire HVAC system, verify that the new heat pump integrates seamlessly with existing components such as ductwork or thermostats.

Regular Maintenance Extends Lifespan

To delay future replacements and maximize the lifespan of your new investment, schedule regular maintenance checks performed by qualified HVAC professionals. Tasks like cleaning filters, inspecting ducts for leaks, checking refrigerant levels, and lubricating moving parts keep systems running efficiently year-round.

Replacing an outdated heat pump not only restores comfort but also saves money in the long run through improved energy efficiency and reduced repair costs. By recognizing key indicators early on and understanding available options, you’ll be better equipped to make informed decisions about maintaining or upgrading your HVAC system efficiently.

Improving Indoor Air Quality: How an HVAC Contractor Woodbridge VA Can Enhance Efficiency

Indoor air quality (IAQ) is a critical component of your home’s overall comfort and health. Poor IAQ not only affects the well-being of those living in your space but also directly impacts your HVAC system’s performance and efficiency. Recognizing the issues associated with indoor air quality can help you take preventive measures to improve air circulation, reduce pollutant levels, and ensure your HVAC system functions optimally.

Common Indoor Air Quality Issues

  • Dust and Allergens: Accumulation of dust, pollen, pet dander, and other allergens in the home.
  • High Humidity Levels: Excess humidity promotes mold growth and increases strain on HVAC systems.
  • Volatile Organic Compounds (VOCs): Emissions from cleaning products, paints, or furniture can affect IAQ.
  • Inadequate Ventilation: Poor airflow prevents the proper exchange of fresh air with stale indoor air.
  • Dirty Filters: Clogged filters restrict airflow and recirculate contaminants in your home.

How Poor IAQ Impacts HVAC Efficiency

  1. Increased Strain on Equipment: Dust and debris build-up force your system to work harder to maintain desired temperatures. This can lead to higher energy consumption and wear-and-tear on components.
  2. Reduced Cooling or Heating Performance: Pollutants trapped in ductwork or filters impede airflow, making it harder for the system to regulate temperature effectively.
  3. Frequent Repairs: Systems operating under constant stress due to poor IAQ are more likely to experience breakdowns or failures over time.
  4. Shortened Lifespan: Continuous exposure to contaminants leads to premature aging of mechanical parts such as motors, fans, or compressors.

Steps to Address Indoor Air Quality Issues

  • Replace or clean filters regularly (every 1–3 months) based on usage and manufacturer recommendations.
  • Schedule routine maintenance for your HVAC system at least twice a year.
  • Install whole-home dehumidifiers or humidifiers as needed to maintain optimal humidity levels (30–50%).
  • Use exhaust fans in kitchens or bathrooms to reduce moisture buildup.
  • Consider advanced filtration systems like HEPA filters or UV light purifiers for added protection against pollutants.
Air Quality Solution Benefits
Regular Filter Changes Improves airflow and reduces strain on the system
Duct Cleaning Removes hidden dust and debris that could recirculate through the home
Dehumidifiers Controls moisture levels; prevents mold growth
Whole-House Ventilation Ensures continuous exchange of stale indoor air with fresh outdoor air
Advanced Air Purification Eliminates finer particles like bacteria, viruses, VOCs

Monitoring Indoor Air Quality for Long-Term Efficiency

Installing an indoor air quality monitor can help you track pollutants like carbon dioxide (CO2), volatile organic compounds (VOCs), particulate matter (PM2.5), temperature, and humidity levels in real-time. With this data on hand, you can make timely adjustments that benefit both your household’s health and your HVAC system’s longevity.

By addressing common IAQ challenges early, you protect not only the efficiency of your heating and cooling systems but also ensure a healthier living environment for everyone in your space.

Exploring the Typical Costs and Factors Involved in Replacing a Central Air Conditioning Unit

Replacing a central air conditioning unit can be a significant investment for homeowners. Understanding the associated costs and the factors that influence them is crucial for budgeting and ensuring you make the best decision for your home. Below is a detailed guide to help you navigate the process.

Average Costs of Replacing a Central Air Conditioning Unit

Component/Service Average Cost Range
New AC Unit $3,000 – $7,500
Installation Labor $1,200 – $2,800
Ductwork Repairs/Replacement $1,500 – $3,000 (if needed)
Permits and Inspections $250 – $750
Thermostat Upgrade (Optional) $200 – $600

The total cost typically falls between $5,000 and $12,000, depending on your home’s specifics and the choices you make during the replacement process.

Key Factors That Influence Replacement Costs

  • Energy Efficiency Rating (SEER): Higher SEER-rated units are more efficient but often come with higher upfront costs. However, they may save money in energy bills over time. For example:
  • Units with SEER ratings of 13-15 are more affordable.
  • Units with SEER ratings above 20 offer greater efficiency but increase initial expenses.
  • Size of the Unit: The size (measured in tons of cooling capacity) directly impacts costs. Larger homes require larger units to maintain comfortable temperatures.
  • Ductwork Condition: If your existing ductwork is damaged or incompatible with the new system, repairs or replacements will add to your total expenses.
  • Brand Reputation: Premium brands often offer better warranties and advanced features but come at higher price points.
  • Installation Complexity: Homes with limited space or challenging layouts may incur additional labor fees due to increased installation time or special equipment requirements.

Tips for Reducing Replacement Costs

  1. Get Multiple Quotes: Request quotes from at least three licensed HVAC contractors to compare pricing.
  2. Consider Rebates and Tax Credits: Look for rebates offered by manufacturers or local governments for installing energy-efficient systems.
  3. Time Your Replacement Wisely: Prices tend to rise during peak seasons (summer). Consider scheduling replacement in spring or fall.
  4. Bundle Services: If you also need furnace maintenance or other HVAC services, bundling jobs may qualify you for discounts.
  5. Evaluate Financing Options: Many HVAC companies offer financing plans that spread out payments over time.

Importance of Choosing the Right Professional

  • Verify their credentials (license and insurance).
  • Ask about their experience with your specific AC brand/model.
  • Request references from previous clients.
  • Confirm warranty terms on both parts and labor.

Taking these steps ensures you receive quality service while protecting your investment.

By understanding typical costs and key factors involved in replacing a central air conditioning unit, homeowners can make informed decisions that meet their budgetary needs while ensuring comfort year-round.


Continue ReadingRecognizing the Common Signs That Your Furnace Needs Immediate AC Repair Woodbridge VA